
 100% FREE ACCESS
12th Standard Syllabus & Materials
12th Standard
TN 12th Computer Applications மின்னணு தரவு பரிமாற்றம் Sample Question Papers Study Material - QB365 Set A
NEW12th Standard
TN 12th Computer Applications மின் - வணிக பாதுகாப்பு அமைப்புகள் Sample Question Papers Study Material - QB365 Set A
NEW12th Standard
TN 12th Computer Applications மின்னணு செலுத்தல் முறைகள் Sample Question Papers Study Material - QB365 Set A
NEW12th Standard
TN 12th Computer Applications மின் - வணிகம் Sample Question Papers Study Material - QB365 Set A
NEW12th Standard
TN 12th Computer Applications திறந்த மூல கருத்துருக்கள் Sample Question Papers Study Material - QB365 Set A
NEW12th Standard
TN 12th Computer Applications வலையமைப்பு வடமிடல் Sample Question Papers Study Material - QB365 Set A

Published on: 06/01/2020
Adobe InDesign CC 2019
Download Tamil Nadu 12th Standard Computer Technology question papers, model tests, one-mark questions, important questions, and public exam papers in PDF format. Free study materials and answer keys for TN State Board students.
Questions + Answers key
Take MCQ Computer Technology Test
1.
A _________ is a color that you apply to the outline of an object.
Stroke
Fill
Out-Color
Paint
2.
A color you apply to the inside of an object is called
Fill
Stroke
Paint
In-Color
3.
__________ is an element on the page that is not text.
Graphic
Vector
Scalar
Everything must be text
4.
__________ is the box that contains all the tools available in InDesign.
Tools panel
Control panel
Container
None
5.
A set of two document pages that face each other can be termed as
Spread
folder
File
frame
6.
Write the steps for opening and closing the tools panel.
7.
What is Zooming?
Graphic
Vector
Scalar
Everything must be text
8.
When does a tooltip appear?
Gutter
vacuum
empty area
Interstellar
9.
How many types of orientation are available by default? What are they?
text frame
shape
clipboard
None of the above
10.
What type of software is Adobe InDesign?
Story
Paragraph
Object
Palette
11.
How many graphic frames are found in Tools panel? What are they?
12.
Explain briefly how you can create an object.
13.
How can you make characters superscript or subscript?
14.
Write all the keyboard shortcuts for functions associated with zooming.
Fill
Stroke
Paint
In-Color
15.
Explain briefly about Tools Panel.
Bitmap
JPEG
PNG
All of these
16.
How can you insert picture in a graphic frame? Write the steps.
17.
Write the steps to place text into a document.
18.
Write the steps to create type on a path.
19.
Write the steps to create a new document in InDesign.
1.
(a)
Stroke
2.
(a)
Fill
3.
(a)
Graphic
4.
(a)
Tools panel
5.
(a)
Spread
6.
To open or close the Tools panel
(i) Choose Window > Tools to close the Tools panel.
(ii) To reopen the Tools panel, choose Window > Tools again. (or)
(iii) Press Tab key (with any tool but the Type tool selected) to close all open panels, including the Tools panel.
(iv) To reopen those panels, press Tab again.
(v) We can also close a floating Tools panel by clicking its Close box.
7.
The Page tool is used for creating different page sizes within a document.
8.
If you place the cursor over any tool in the Tools panel without clicking, a tooltip appears displaying the tool's name and a keyboard shortcut in parentheses.
9.
Orientation:
(i) Specify a page orientation for the document.
(ii) Landscape or Portrait.
10.
(i) Adobe InDesign is a page layout software program.
(ii) Page layout software includes tools that allow you to easily position textand graphics on document pages.
11.
The Tools panel contains three tools for drawing graphic frames.
1. Ellipse Frame - This tool lets you create oval and round frames.
2. Rectangle Frame - This tool lets you create rectangular and square frames.
3. Polygon Frame - This tool lets you create equilateral polygons frames.
12.
Creating an Object:
(i) Shapes can add visual interest to a document and serve as a background for text.
(ii) The tools for creating shapes include the Rectangle, Ellipse, and Polygon tools.
(iii) To select a shape tool, click and hold down the mouse button on the Rectangle tool (or currently selected shape tool) on the Tools panel, and then select the shape tool you want to use.
(iv) With a shape tool selected, you can create a shape manually by dragging in the document, or you can click in the document to open the shape's dialog box and define its settings.
(v) You use the Swatches panel to add color to the fill and stroke (border) of your shape, and the Stroke panel to change the weight (thickness) and style of the stroke.
13.
Making Characters Superscript or Subscript
You can change the text in Superscript or Subscript from Control palette:
(i) Select the character that you want to change Superscript or Subscript.
(ii) Click on one of the buttons in the Control palette.
Superscript (T2)
Subscript (H2O)
(iii) The character you selected changes to the required one.
14.
Using the keyboard
(i) Press Ctrl + = to zoom in.
(ii) Press Ctrl + - to zoom out.
(iii) Press Ctrl + 1 to view a page at actual size.
(iv) Press Ctrl + 2 to view a page at 200%.
(v) Press Ctrl + 0 to fit the entire page in the document window.
(vi) Press Alt + Ctrl + 0 to fit the entire spread in the document window.
(vii) Press Ctrl + Spacebar or Ctrl + Alt + Spacebar to temporarily access the Zoom tool and zoom in or out.
15.
Tools panel:
The Tools panel contains selection tools, tools for drawing basic shapes, path drawing and editing tools, transformation tools, text editing tools, navigation tools, and object formatting tools.
(i) By default, the Tools panel is docked under the Control panel.
(ii) All tools are found in the Tools panel, located along the left side of your document window.
16.
Creating Graphic Frame
(i) Graphic frame can hold graphic content.
(ii) You can distinguish a text frame from a normal graphic frame because the graphic frames display a non-printing 'X' in their centres.
(iii) Graphic frames are used to import pictures of other software programs. In InDesign, all imported images are contained within graphic frames.
(iv) The Tools panel contains three tools for drawing graphic frames.
1. Ellipse Frame - This tool lets you create oval and round frames.
2. Rectangle Frame - This tool lets you create rectangular and square frames.
3. Polygon Frame - This tool lets you create equilateral polygons frames.
To create a Rectangle frame
1. Click on the Rectangle Frame tool in the Tools panel (or) Press F in the keyboard.
2. Position the Rectangle Frame tool pointer on the page.
3. Drag to create a rectangle frame that is approximately the size and shape you want, then release the mouse button.
When you release the mouse button after creating a Rectangle frame, the frame you created is active.
If the Selection tool was previously selected, the frame is displayed within its bounding box, which contains eight resizing handles, which help you to change the shape or size of the bounding box or the frame.
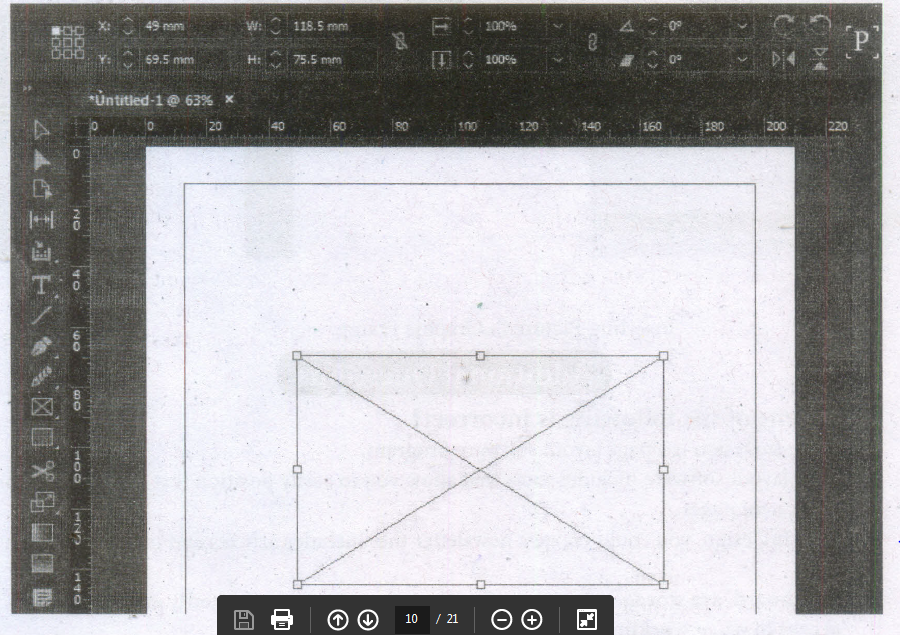
Creating a Rectangle frame
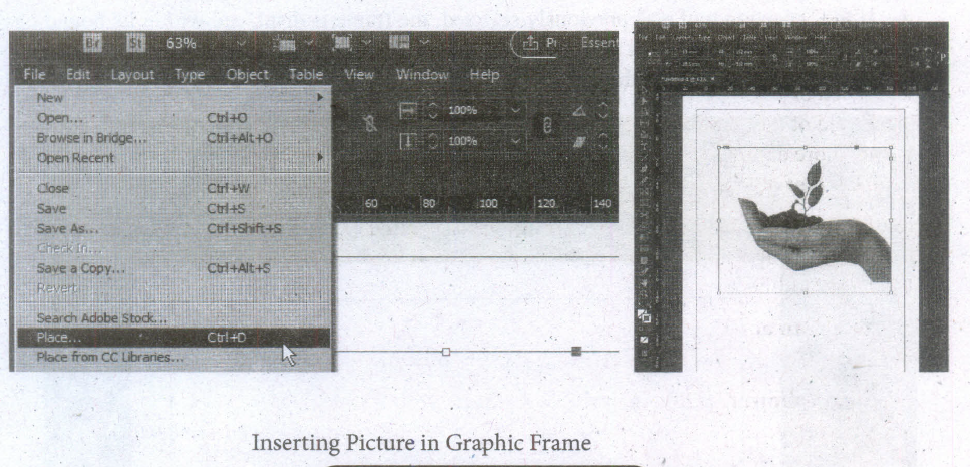
Inserting Picture in Graphic Frame
Graphic frames are used to import pictures of other software programs. You can insert the picture in the frame.
1. Make a graphic frame.
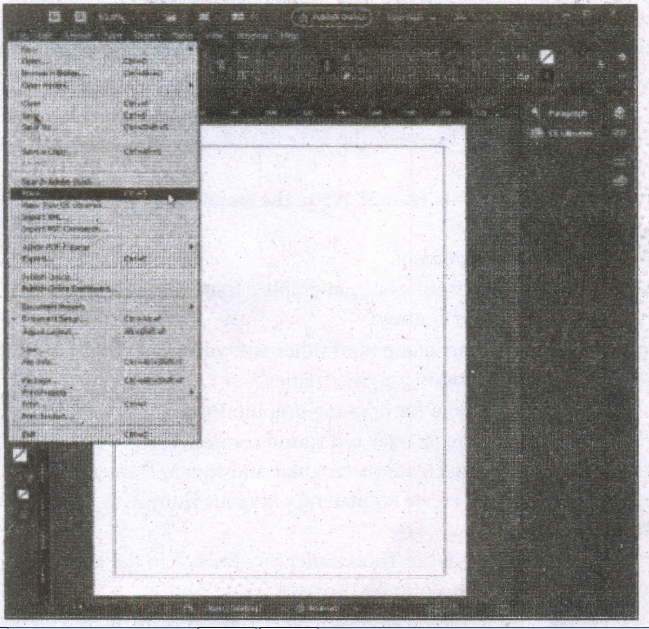
2. Choose File > Place in the menu.
The Place dialog box appears.
3. Locate and select the picture you want to insert the frame.
4. Click on Open.
The picture will appear in the graphic frame.
17.
Follow these steps to place text into a document:
1. Choose File> Place in the menu bar, Place dialog box appears.
2. Locate the text file you want to place, select it and click the Open button on the right side of the Place dialog box.
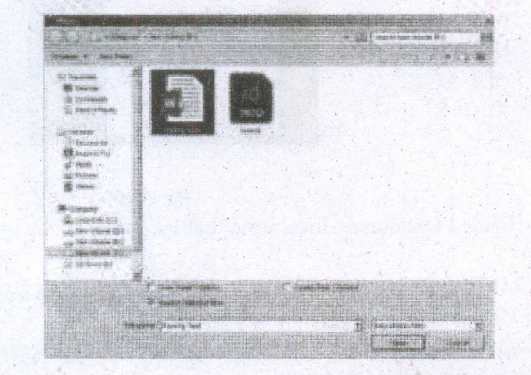
Place option in the File Menu
Place dialog box
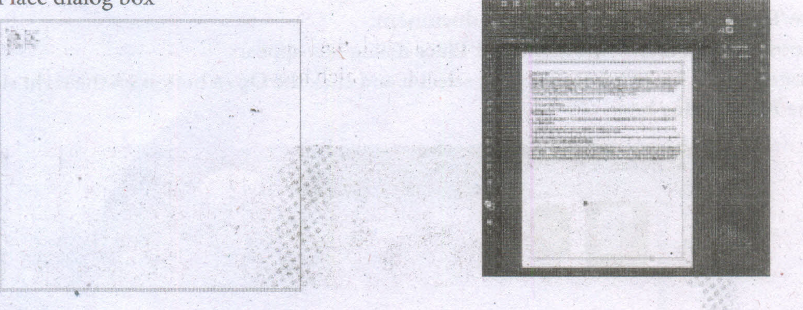
The loaded text cursor
Text Frame
3. Your cursor changes to the loaded text cursor, indicating that the text is ready to be placed into your document.
4. Either click to place the text (filling the current column from the point at which you clicked to the end of the page) or click and drag to create a new text frame.
5. If a text frame cannot contain all the text placed within it, a red plussign overflow symbol appears on the lower-right border of the text frame.
(i) Clicking this overflow symbol loads the remaining text into your cursor for placement in an additional text frame.
(ii) To place this text, just click or click and drag to create a new text frame with the additional text.
(iii) This new text frame is linked to the previous text frame.
(iv) When linked, text flows freely between the two frames if you change the size of the frames or the formatting of the text. .
18.
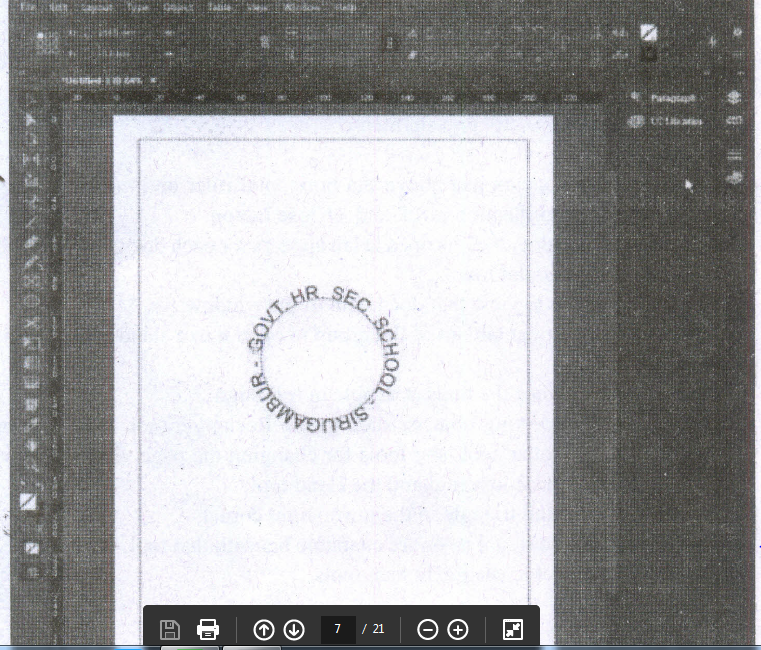
Creating Path Type
(i) With the Type on a Path tool, you can add type along the inner or outer edge of a path.
(ii) You can place the text on either side of the path, but not on both.
(iii) If you initially place it on the inner part of the path, you can always move it to the outer part of the path later.
(iv) When you select text on a path, brackets appear that you can drag to adjust the position and placement of the text.
Create Type on a Path
1. Select the Type on a Path tool on the Tools panel.
2. Click on the edge of the path (closed or open) to which you want to add type. A flashing insertion point appears in the text frame. Any fill or stroke on the object is removed.
3. Type some text. The text automatically wraps to the shape of the text frame. Don't press Enter key. The type appears along the edge of the object, conforms to its shape, and removes the fill and stroke. If the overflow symbol appears, deselect the text frame, select the Direct Selection tool on the Tools panel, and then drag a corner to reshape the text frame.
4. Select a Selection tool or select the Type tool again.
19.
Starting Adobe InDesign CC
1. Choose Start> All Programs> Adobe lriDesign CC 2019 (or)
Click on the InDesign short cut on the desktop.
2. Welcome to InDesign window will open. Now click on Create New ... button.
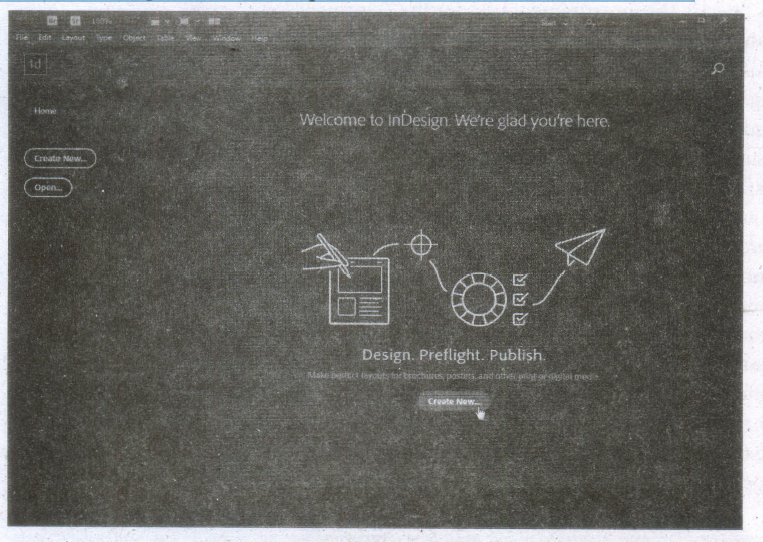
3. Now a New Document window will open.
When You create a new document, you have the opportunity to set many options in the New Document dialog box.
To set the basic options for a new document:
i) In the New Document dialog box, click a category tab: Print, Web, or Mobile.
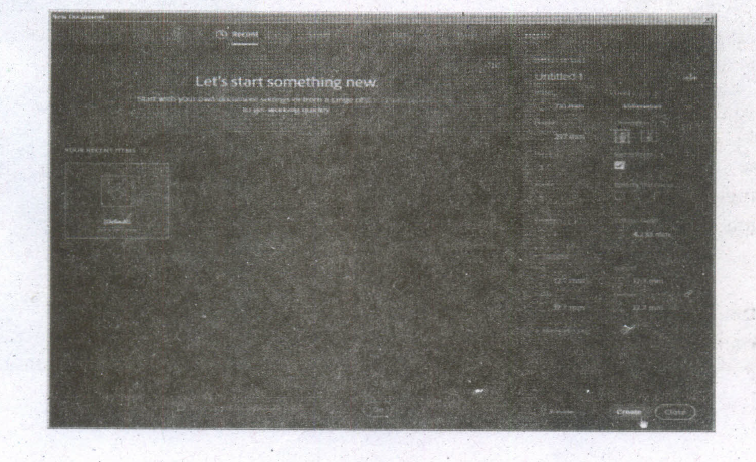
Specify the following options.for the selected preset:
Width and Height: Specify the size of the document.
Units: Specify the measurement unit for the document.
Orientation: Specify a page orientation for the document: Landscape or Portrait.
Pages: Specify the number M pages to create in the document.
Facing pages: If you're creating a single-sided document-like an advertisement, poster, or handbill-leave Pacing Pages turned off. Turn it on for books and magazines, which usually have both left-hand and right-hand pages.
Start#: Specify which number the document starts on. If you specify an even number (such as 2) with Pacing Pages selected, the first spread in the document begins witha two-page spread.
Primary Text Frame: Select this option to add a primary text frame on the master page.
Columns: Specify the number of columns to add in the document.
Column Gutter: Specify the amount of whitespace between columns.
Margins: Specify the margins for each side of the document. To use. different values for different sides, delink the dimensions by clicking the chain icon.
Bleed and Slug: Specify the position of the bleed and slug along each side of the document. To use different values for different sides, delink the dimensions by clicking the chain icon.
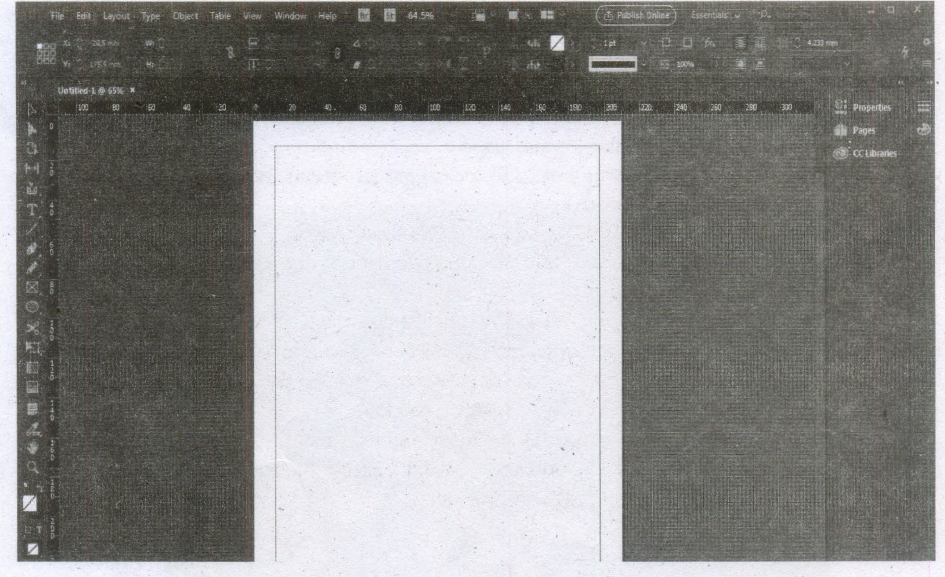
4. Click the Create button to open a document with the preset settings.

12th Standard Syllabus & Materials
12th Standard
TN 12th Computer Applications களப்பெயர் முறைமை (DNS) Sample Question Papers Study Material - QB365 Set A
NEW12th Standard
TN 12th Computer Applications வலையமைப்பு எடுத்துக்காட்டுகள் மற்றும் நெறிமுறைகள் Sample Question Papers Study Material - QB365 Set A
NEW12th Standard
TN 12th Computer Applications கணினி வலையமைப்பு ஓர் அறிமுகம் Sample Question Papers Study Material - QB365 Set A
NEW12th Standard
TN 12th Computer Applications PHP-உடன் MySQL-ஐ இணைத்தல் Sample Question Papers Study Material - QB365 Set A



Tamilnadu Stateboard 12th Standard Subjects

Maths

Chemistry

Physics

Biology

Computer Science

Business Maths and Statistics

Economics

Commerce

Accountancy

History
Computer Applications
Biology
Computer Technology
Computer Applications
Computer Science
Business Maths and Statistics
Commerce
Economics
Maths
Chemistry
Physics
Computer Technology
History
Accountancy

Tamil

English

French
Tamilnadu Stateboard Standards
